Decals for 1/72 Sopwith Camel Part.1
Out Of Stock


Decals for 1/72 Sopwith Camel Part.1
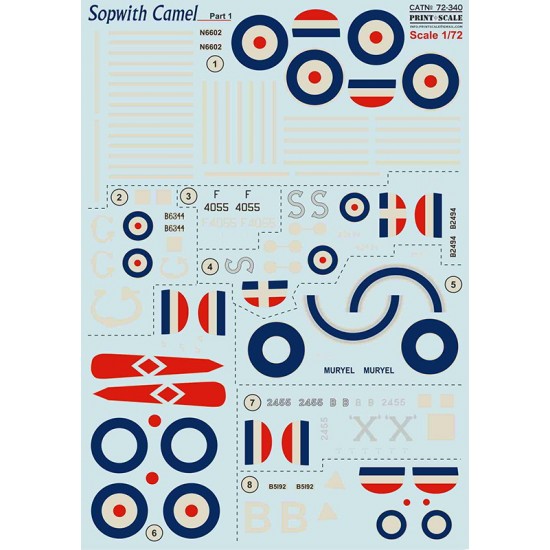
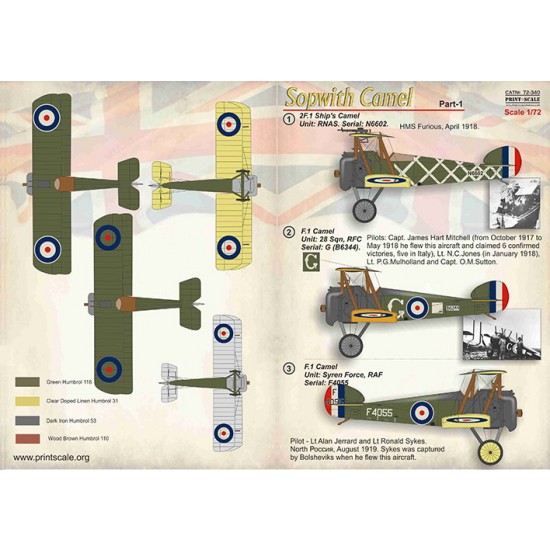
1. 2F.1 Ship's Camel. Unit: RNAS. Serial: N6602. HMS Furious, April 1918.
2. F.1 Camel. Unit: 28 Sqn, RFC. Serial: G (B6344). Pilots: Capt. James Hart Mitchell (from October 1917 to May 1918 he flew this aircraft and claimed 6 confirmed victories, five in Italy), Lt. N.C.Jones (in January 1918), Lt. P.G.Mulholland and Capt. O.M.Sutton.
3. F.1 Camel Unit: Syren Force, RAF Serial: F4055.
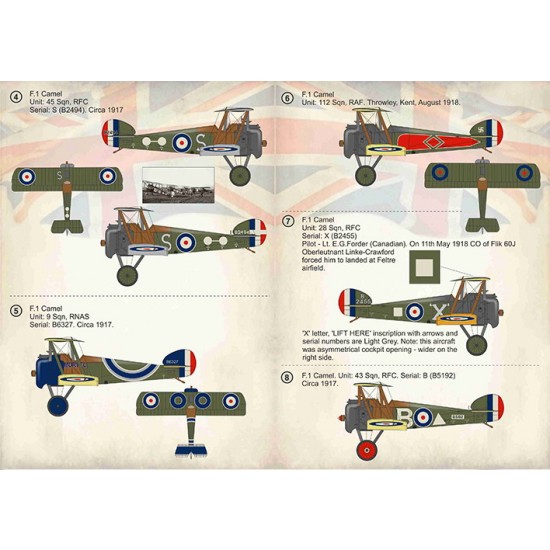
4. F.1 Camel. Unit: 45 Sqn, RFC. Serial: S (B2494). Circa 1917.
5. F.1 Camel. Unit: 9 Sqn, RNAS. Serial: B6327. Circa 1917.
6. F.1 Camel. Unit: 112 Sqn, RAF. Throwley, Kent, August 1918.
7. F.1 Camel. Unit: 28 Sqn, RFC. Serial: X (B2455) Pilot - Lt. E.G.Forder (Canadian). On 11th May 1918 CO of Flik 60J . Oberleutnant Linke-Crawford forced him to landed at Feltre airfield.
8. F.1 Camel. Unit: 43 Sqn, RFC. Serial: B (B5192) Circa 1917.
Water-slide Decals:
Instruction:
1. Preparation: to achieve better result, a gloss or semi-gloss coat is very important. It will make a smooth layer which the decals will suction to and make it much easier to apply and set them.
2. Cut out the decal you need (do it on cutting mat)
3. Grab the decal with tweezers, place it on the surface of the water and leave it for about 20 seconds.
4. Remove the decal from the water and place it on paper towel to remove any excess water.
5. Apply decal solution to the part where the decal is to be placed.
6. Slide the decal off the backing paper on to the model. Using a paint brush or cotton bud is a good way to do this without damaging the decal.
7. Use the brush, knife or cotton bud to position the decal. Using your paper towel, gently dab the decal and soak up the excess water (decal softner is also recommended at this stage. After applying softner, the decal will suction to the part and flatten out smooth.)
8. When the decal is completely dry, give another coat of varnish or Klear/Future to seal it.
| General Info | |
| Scale | 1/72 |
| Type | Model Upgrade/Accessory |
| Subtype | Decals / Stickers |
- Stock: Out Of Stock
- Reward Points: 15
- SKU: PRS72-340
MRP: US$18.46 US$3.5519% OFF
US$14.91
(excl. Tax)
US$35.46
Ex Tax:US$35.46
US$15.26
Ex Tax:US$15.26
US$14.91
Ex Tax:US$14.91
US$16.78
Ex Tax:US$16.78
US$4.67
Ex Tax:US$4.67









































-200x100.png)
























![1/48 Kurfurst: WWII German Messerschmitt Bf 109K-4 [Limited Edition] 1/48 Kurfurst: WWII German Messerschmitt Bf 109K-4 [Limited Edition]](/image/cache2/70x70/catalog/eduard/ED11177.jpg?v=3)


